How to Apply your
Nailora Nails
Pro Tips
-
Apply at night
Your nails need 3 hours without water to bond properly. Applying before bed guarantees this.
-
Start with your toenails
Do your feet first while your hands are free, then move to your fingernails.
-
Begin with your pinky
Work from the smallest finger to the thumb for more control.
-
Use a hair dryer
Once the gel pad is placed but before peeling the film, warm it up for a few seconds to activate the adhesive.
-
Avoid oil-based products
For the first 24 hours, avoid hand creams or cuticle oils — they weaken the bond.
Gel Pad Application
Follow these 10 steps for a flawless, long-lasting set — every single time.
Detailed Instructions
Wash your hands

Clean hands ensure no oils or bacteria transfer to your nail prep. Wash thoroughly and dry completely before starting.
Size your nails

Lay out all 10 press-on nails and match each one to your natural nail. The press-on should cover your nail from side wall to side wall.
Push back your cuticles

Gently push back your cuticles with a cuticle pusher or an orangewood stick. This creates more surface area for a longer-lasting hold.
Polish your nails

Lightly buff the surface of your natural nails with a buffer block. This removes shine and creates a texture for better adhesion.
Degrease your nails

Wipe each nail with an alcohol prep pad or nail cleanser to remove all oils and dust. Do not touch your nails after this step.
Choose the right gel pad

Select the gel adhesive pad that best fits your nail. It should match the size of your natural nail — not smaller, not larger.
Apply the gel pad

Peel one side of the gel pad and stick it firmly to your natural nail. Press down from the center outward to remove any air bubbles.
Remove the protective film

Peel off the remaining protective film from the top of the gel pad to expose the adhesive surface for your press-on nail.
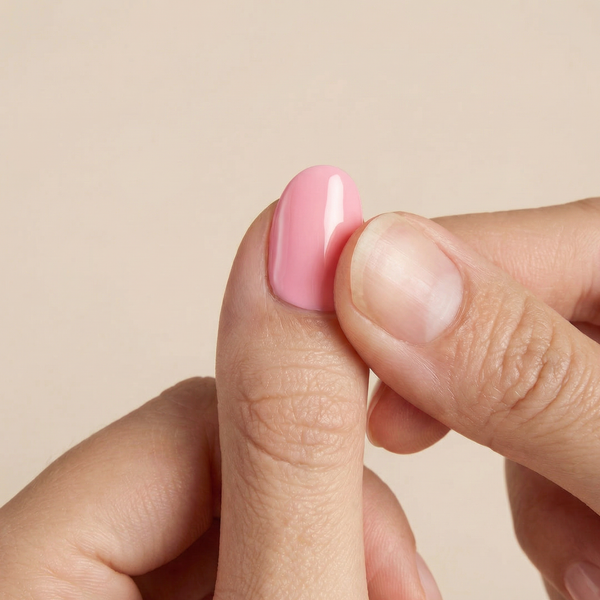
Press on and hold

Align the press-on nail with your cuticle line and press firmly from base to tip. Hold for 20–30 seconds to activate the gel adhesive bond.
Finish and enjoy
Repeat for all 10 nails. Avoid water for 1–2 hours to let the bond fully set. Your Nailora nails are ready to show off!
FAQ
With our gel pads, expect 5–7 days of beautiful wear. With nail glue, up to 2–3 weeks. Results vary based on nail prep and daily activities — the better the prep, the longer the wear.
We recommend waiting at least 2–3 hours after application before getting them wet. Brief contact with water is totally fine — extended soaking like long baths or swimming may reduce wear time.
Not when removed correctly. Always soak your nails in warm water for a few minutes before gently peeling them off — never force them. Our press-ons are designed to be kind to your natural nails.
Gel pads are included in every Nailora set and provide a gentle, residue-free hold — no glue needed. For a longer-lasting bond (up to 2–3 weeks), optional nail glue can be used instead. We recommend gel pads for everyday wear and reusability.
Yes! Each set is designed to be reused 4–5 times. Remove gently, wash with warm water, let them dry completely, and store them in the original box between uses.
Still have questions? Visit our full FAQ page
Ready for your perfect set?
Shop our collection and find your new go-to.-

 Laure — Short Square Milk White Press On NailsLaure — Short Square Milk White Press On Nails
- Regular price
-
$29.95 - Regular price
-
- Sale price
-
$29.95
Quick view
-

 Bérénice — Medium Almond Deep Red Cat-Eye Press On NailsBérénice — Medium Almond Deep Red Cat-Eye Press On Nails
- Regular price
-
$29.95 - Regular price
-
- Sale price
-
$29.95
Quick view
-

 Marguerite — Extra Short Almond Pearl French Tip Press On NailsMarguerite — Extra Short Almond Pearl French Tip Press On Nails
- Regular price
-
$29.95 - Regular price
-
- Sale price
-
$29.95
Quick view
-

 Camille — Long Almond Nude Metallic Press On NailsCamille — Long Almond Nude Metallic Press On Nails
- Regular price
-
$29.95 - Regular price
-
- Sale price
-
$29.95
Quick view
-

 Lucie — Extra Short Square Baby Pink Press On NailsLucie — Extra Short Square Baby Pink Press On Nails
- Regular price
-
$29.95 - Regular price
-
- Sale price
-
$29.95
Quick view
-

 Victoire — Medium Almond White Press On NailsVictoire — Medium Almond White Press On Nails
- Regular price
-
$29.95 - Regular price
-
- Sale price
-
$29.95
Quick view
-

 Rosalie — Extra Short Round Cherry Red Press On NailsRosalie — Extra Short Round Cherry Red Press On Nails
- Regular price
-
$29.95 - Regular price
-
- Sale price
-
$29.95
Quick view
-

 Gabrielle — Medium Almond Nude Press On NailsGabrielle — Medium Almond Nude Press On Nails
- Regular price
-
$29.95 - Regular price
-
- Sale price
-
$29.95
Quick view


